ツールと設定
Deep Learning Studio
To create an
| 1. | Deep Learning Studioを開始します。 |
| 2. | Create a new project and select EasySegment Supervised in the New deep learning project dialog. . |
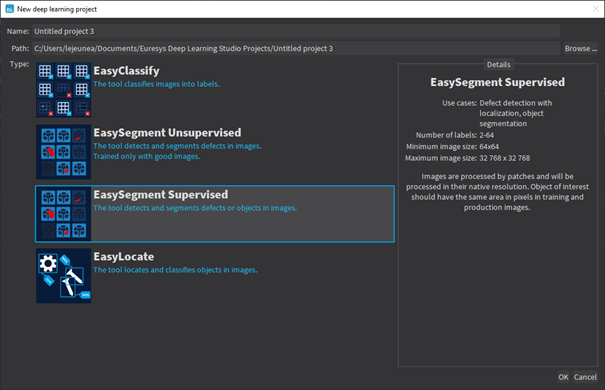
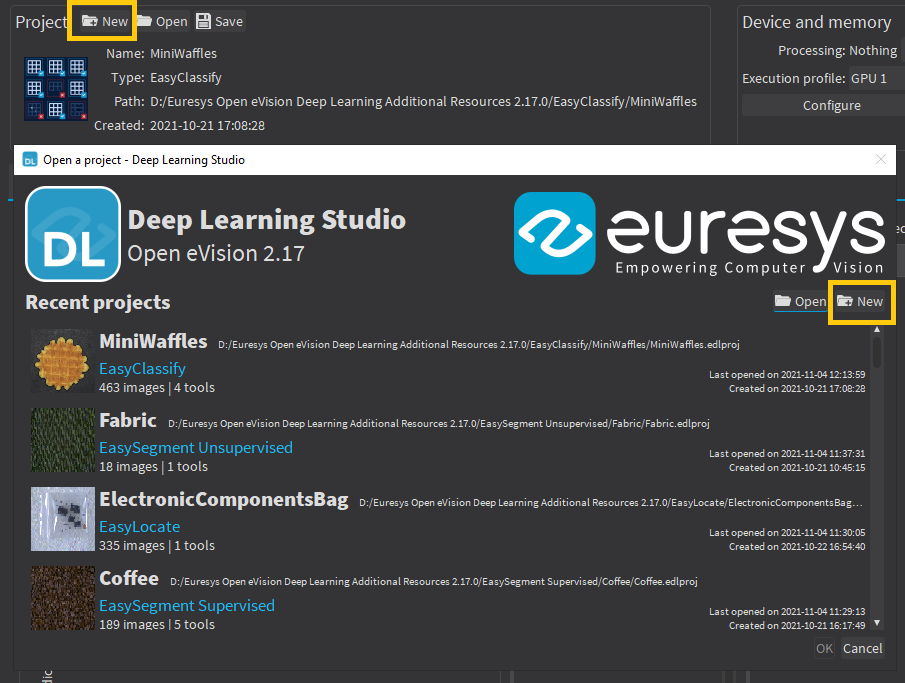
The following dialog is displayed when clicking on New in the Open a project dialog displayed at the start of Deep Learning Studio or when you click on New in the toolbar.
構成
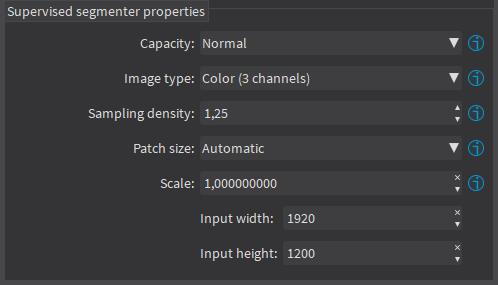
教師ありセグメンテーションツールには5つのパラメーターがあります。
| 1. | ニューラルネットワークの容量(デフォルト:標準)は、学習可能な情報の量を表します。容量が大きいと、ツールの速度が遅くなります。 |
APIでは:
| □ | The capacity is represented by the enumerate type ESupervisedSegmenterCapacity. |
| □ | ESupevisedSegmenter::Capacity sets the capacity of the tool. |
| 2. | 画像タイプ(デフォルト:モノクロ(1チャンネル)): |
APIでは:
| □ | To use monochrome (grayscale, 1 channel) images, set ESupervisedSegmenter::ForceGrayscale to true. |
| □ | To use color (3 channels) images, set EUnsupervisedSegmenter::ForceGrayscale to false. |
| 3. | The Sampling density (ESupervisedSegmenter::SamplingDensity) is the parameter of the sliding window algorithm used to process whole images using patches of size (ESupervisedSegmenter::PatchSize). |
| □ | これは、イメージパッチ間のオーバーラップの程度を示します。 |
100 - 100 / (%)
| □ | 実際には、2つの連続したパッチ間のストライドは: |
PatchSize / SampleDensity (ピクセル)
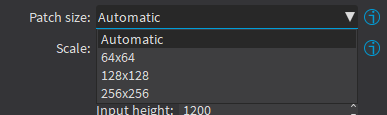
| 4. | The Patch size (ESupervisedSegmenter::PatchSize) is the size of the patches processed by the neural network. |
| □ | By default, the patch size is determined automatically from the images in the training dataset. |
| □ | You can also select the resolution of the patch size from the drop down list. |
| 5. | Use the Scale (ESupervisedSegmenter::Scale) to automatically resize your images to a lower resolution and accelerate the processing. |
Deep Learning Studio:
| □ | データに異なる解像度の画像が含まれている場合、Input widthとInput heightが与えられたスケールでの解像度の範囲を示します。 |
| □ | データセット内のすべての画像が同じ解像度を持つ場合、Input widthまたはInput heightを編集してスケールを変更します。 |
学習
ツールをトレーニングするには、ディープラーニングツールのトレーニングを参照してください。