In some cases, most often to decrease the processing time or to single-out the object In a general content, the term object should be understood with the meaning of a class instance. In EasyObject, an object is a maximally-sized area of adjacent connected pixels belonging to the layer foreground. you want to read, you do not want to process the whole image but only one or several well defined rectangular parts of this image, or ROIs (Regions Of Interest).
In Open eVision, ROIs are attached to an image and exist only as long as the parent image is available.
Creating a ROI
| 1. | Open the image: |
| □ | If the image is already open, activate the corresponding image window. |
| □ | If the image is not open yet, go to the main menu: Image > Open... to open one. |
| 2. | To create an ROI, go to the main menu: Image > ROI Management.... |
The ROI Management window is displayed as illustrated below.

| 3. | Select the image in the tree. |
| 4. | Click on the New button. |
| 5. | In the dialog box, enter a Variable name for the new ROI. |
The ROI is represented as a color rectangle on your image as illustrated below.
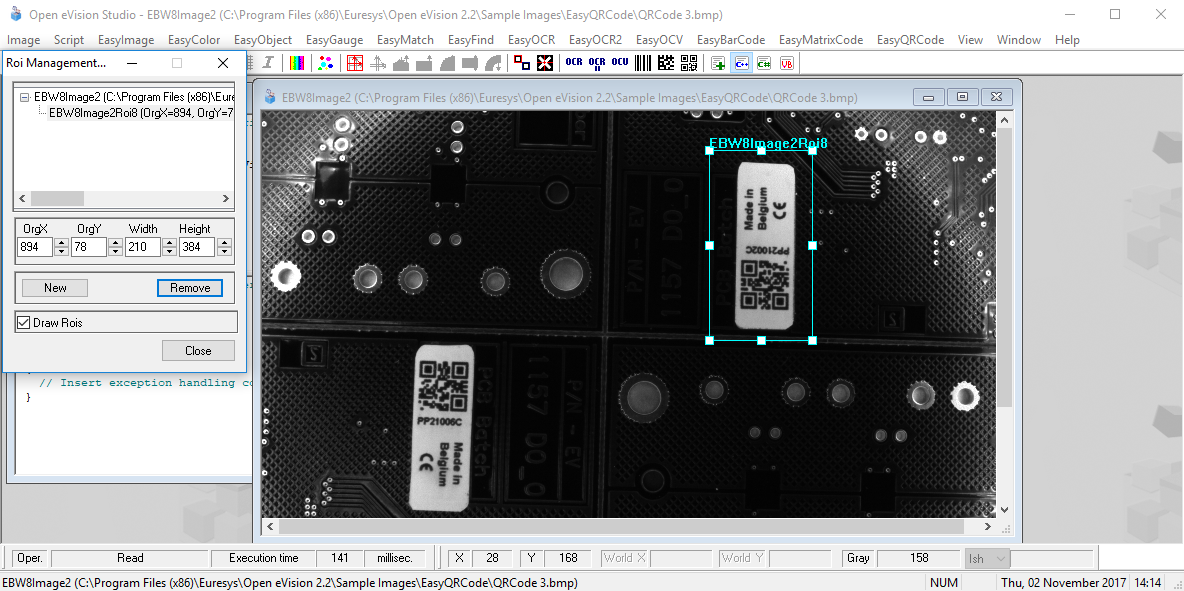
| 6. | Drag the ROI corner and side handles to move it to the required position. |
| 7. | Click on the Close button to close the ROI Management window . |
The next step is Step 4: Configuring the Tool.
Managing ROIs
You can add, change and remove ROIs.
An image can have several ROIs. Each ROI can be attached directly to the image (meaning that its position is relative to the image) or to another ROI (meaning that its position is relative to this 'parent' ROI).
| 1. | To manage ROIs, go to the main menu: Image > ROI Management.... |
The ROI Management window is displayed with the ROI relation tree as illustrated below.
If the Draw Rois box is checked, all ROIs are displayed on the image with a different color.
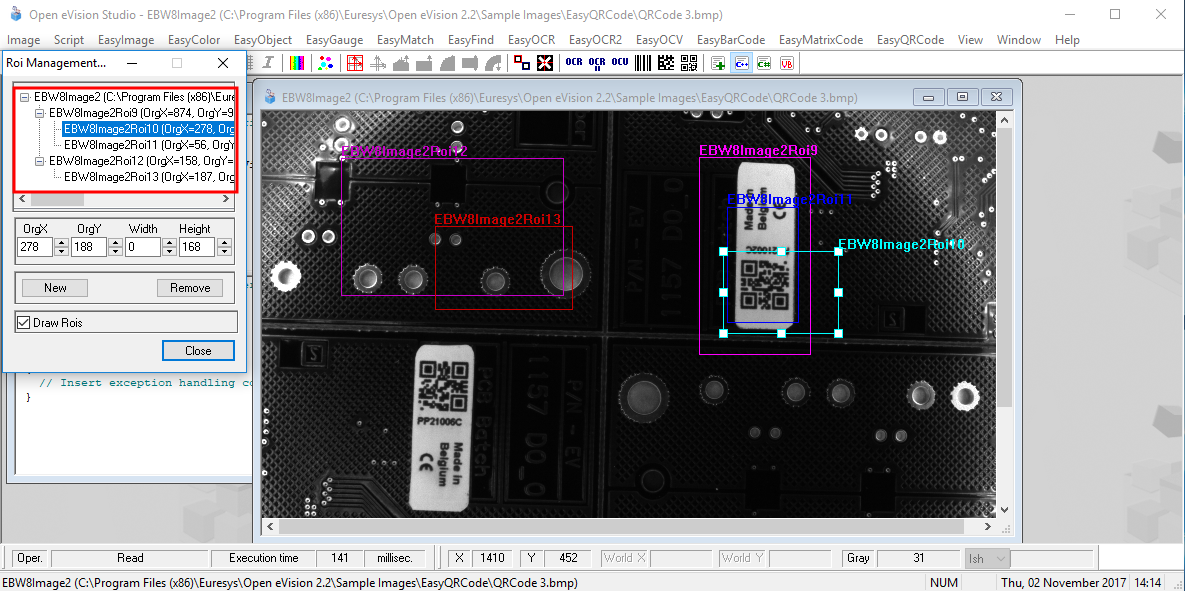
| 2. | Select an ROI in the ROI relation tree. |
| 3. | Drag the ROI corner and side handles to change the position and size of the selected ROI (as well as the position of all ROIs attached to it if any). |
| 4. | Click on the New button to add a new ROI attached to the selected ROI. |
Select the image at the top of the ROI relation tree to attach the ROI directly to the image.
| 5. | Click on the Remove button to delete the selected ROI (and all ROIs attached to it if any). |
| 6. | Click on the Close button to close the ROI Management window. |