Using a dark image to account for ambient lighting
The photometric stereo assumes that each image is lit from a single light source.
| ● | This assumption is not valid if the setup is exposed to (non-negligible) ambient lighting. |
| ● | To handle this issue, the EPhotometricStereoImager provides an EImageBW8 dark image to the methods Calibration and Compute. |
| □ | This dark image is an image of the object In a general content, the term object should be understood with the meaning of a class instance. In EasyObject, an object is a maximally-sized area of adjacent connected pixels belonging to the layer foreground. under ambient light only (all setup lights are off). |

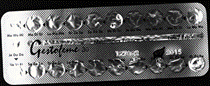
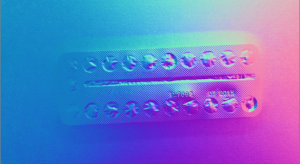
The dark image
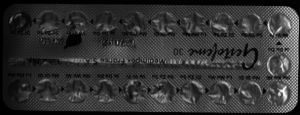

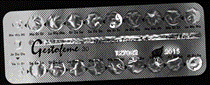
The object image: raw (left) and after correction with the dark image (right)
Using flat images to correct non-uniform lighting
Photometric stereo assumes that each image is lit from an intensity uniform light source.
| ● | This means that each pixel is lit by the same quantity of light. |
| ● | This assumption is not valid in physical setups using leds, where the part of the image closest to the leds receives more light. |
| ● | To handle this issue, the EPhotometricStereoImager provides a method to register a flat image used by the method Compute. |
| □ | This flat image is an image of a uniform background taken in the same lighting configuration. |
// calibrate imager or sets its angles (Todo)

std::vector<EImageBW8> flatImages;


// Load flat images in the same order than the calibration images/angles (Todo)

std::vector<EROIBW8> flatROIs;


// Set the flat images ROIs (Todo)

// Configure flat images, this could optionally be done with a dark image as well
photometricStereo.ConfigureNonUniformLightingCorrection(flatROIs);

// Perform one or more computations, each will use the flat images (Todo)
photometricStereo.Compute(objectROIs);

// Optional: non uniform lighting correction could be disabled or (re-)enabled
// using SetEnableNonUniformLightingCorrection
                // calibrate imager or sets its angles (Todo)

EImageBW8[] flatImages;

// Load flat images in the same order than the calibration images/angles (Todo)

EROIBW8[] flatROIs = new EROIBW8[4];

// Set the flat images ROIs (Todo)

// Configure flat images, this could optionally be done with a dark image as well
photometricStereo.ConfigureNonUniformLightingCorrection(flatROIs);

// Perform one or more computations, each will use the flat images (Todo)
photometricStereo.Compute(objectROIs);


// Optional: non uniform lighting correction could be disabled or (re-)enabled
// using EnableNonUniformLightingCorrection | ● | The following example illustrates the effect of a non-uniform lighting correction on the object images. |
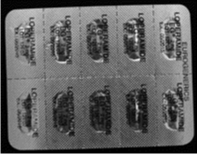
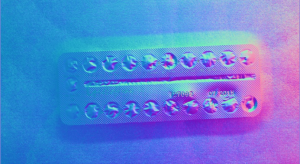
| □ | The proximity of the light source generates a lighting effect on the left of the image that is visible on both the flat and the raw images. |
| □ | This effect is corrected on the last image, where the brightest pixels are those oriented towards the surface. |
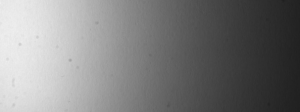
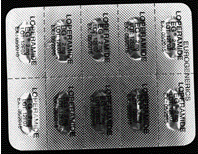
The flat image
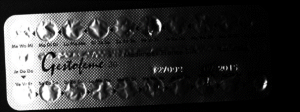
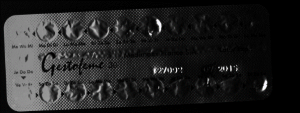
The object image: raw (left) and after correction with the flat image (right)
| ● | The following examples illustrate the effects of a non-uniform lighting correction on 2 albedos images. |
| □ | The corrected albedos show less burning on the extremities of the images. |
The albedos images: raw (left) and after correction with the flat images (right)
| ● | The following examples illustrate the effects of a non-uniform lighting correction on a normals images. |
| □ | The normals fields is more uniform. |
The normals image: raw (left) and after correction with the flat image (right)
Effect of the distance between lights and object
There is a tradeoff in the distance between the light and the object (that is the elevation angle).
| ● | When the elevation angle is high, the lighting is more uniform. This means that: |
| □ | The “burning” effects visible on some images is less important. |
| □ | The shadows are also less of a problem. |
| ● | When the lighting source is close, the lighting directions are more diverse. This means that: |
| □ | The quantity of information used to build the photometric stereo is higher. |
We recommend using elevation angles between 30 and 70°.
We achieve our best results around 40°.