Learning Characters and Creating an EasyOCR Font
Learning Characters
Objective
Following this tutorial, you will learn how to use EasyOCR to learn new characters and save them in an EasyOCR font.
You'll need first to load a source image (step 1). Then you'll set the segmentation parameters to isolate each character (step 2). Each character will have to be learnt (step 3), and finally you'll save all the learnt characters as a font file (step 4). You can also add new characters to an existing font if needed (step 5).
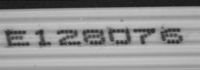
Source image
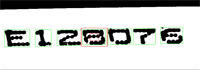
The image is segmented so that all the characters are detected
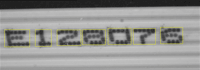
All the characters have been learn
Step 1: Load the source image
|
1.
|
From the main menu, click EasyOCR, then New OCR Tool. |
|
2.
|
Keep the default variable name for the new OCR , and click OK. |
|
3.
|
In the Source Image tab, click the Open icon of the Source Image area, and load the image file EasyOCR\FlatCable\FlatCable1.tif. |
|
4.
|
Keep the default variable name for the new image object, and click OK. |
Step 2: Set segmentation parameters
|
1.
|
Select the Segmentation Parameters tab, and move the red frame in the image above a character. |
|
2.
|
Tune each property to get a green bounding box around each character: |
|
□
|
characters color = Black on White |
Step 3: Learn new characters
|
1.
|
Select the Learn tab, and click the character E in the image. You are then prompted to identify the character along with its class. Enter E in the character field, and select the 'EOcrClass_Uppercase' class. Click OK. Whenever a character has been added to the current font, its bounding box turns yellow. |
|
2.
|
Click the character 1 in the image. Enter 1 in the character field, and select the 'EOcrClass_Digit' class. Click OK. |
|
3.
|
Proceed with remaining characters. |
Step 4: Save the EasyOCR font
|
●
|
In the Font File tab, click the Save As... button. Type a file name for the new EasyOCR font file. Its extension will be .ocr. Finally, click Save. |
Step 5: Add characters to an existing font
|
1.
|
In the Source Image tab, click the Open icon of the Source Image area, and load the image file EasyOCR\FlatCable\FlatCable2.tif. |
|
2.
|
Keep the default variable name for the new image object, and click OK. |
|
3.
|
In the Recognition tab, click Execute. Characters 2 and 8 are read correctly, but A, W and G are not (low confidence score). They don't belong to the font. |
|
4.
|
Select the Learn tab, and learn the characters A, W, and G (refer to step 3). |
|
5.
|
Then save the font again (refer to step 4). The new characters have been added. |