
Creating an EasyOCV Model File
Objective
Following this tutorial, you will learn how to build an EasyOCV model file.
You'll need first to load an image (step 1). Then you'll learn the model file (step 2), and perform the mark inspection (step 3).
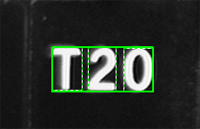
Learned model
Step 1: Load the source image
| 1. | From the main menu, click EasyOCV, then New OCV Tool. |
| 2. | Keep the default variable name, and click OK. |
| 3. | In the Learn tab, click the Open icon of the Source Image area, and load the image file EasyOCV\T20\T20 A.bmp. |
| 4. | Keep the default variable name, and click OK. |
Step 2: Learn the model
| 1. | In the Learn tab, click Next subsequently for three times. |
| 2. | Click Finish. |
The learning process is complete.
Step 3: Save the model file
| 1. | In the Inspect tab, click the Save As... button. |
| 2. | Type a file name for the new EasyOCV model file. Its extension will be .ocv. |
| 3. | Finally, click Save. |