
Unwarping a Distorted Image
Objective
Following this tutorial, you will learn how to use EasyGauge to perform grid calibration, and unwarp a distorted image.
You'll first load an image for calibration —a dot grid— (step 1), and calibrate the field of view (step 2). Then you'll load the distorted image (step 3), and perform the unwarping operation (step 4).
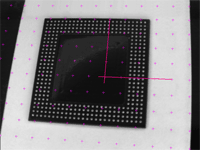
Distorted image

Unwarped image
Step 1: Load the calibration image
| 1. | From the main menu, click EasyGauge, then New World Shape. |
| 2. | Keep the default variable name, and click OK. |
| 3. | In the Dot Grid Calibration tab, click the Open icon, and load the image file EasyGauge\Dot Grid 5.tif. This dot grid has been acquired in the same conditions and has the same distortion as the image we want to unwarp. |
| 4. | Keep the default variable name for the new image object, and click OK. |
Step 2: Calibrate the field of view
| ● | Click Calibrate. |
Step 3: Load the distorted image
| 1. | From the Unwarping tab, click the Open icon, and load the image file EasyGauge\Distorted component.tif. |
| 2. | Keep the default variable name, and click OK. |
Step 4: Unwarp the distorted image
| 1. | In the Destination Image area, click New icon to create a new image. |
| 2. | Keep the default image settings, and click OK. |
| 3. | Select Interpolate checkbox to improve resulting image quality. |
| 4. | Click Unwarp. In the destination image, all distortions are corrected. |