Signing Certificates with XCA
Prerequisites
Before you create your HD1 signed corporate certificate with XCA, perform the following actions:
|
●
|
If you don't have a corporate certificate, create your own SSL private/public key pair and associate it to a self-signed certificate you define as a root CA certificate. You can use XCA to create your own key and certificate. |
Generate a certificate signing request
|
1.
|
Log into the Picolo.net HD1 web interface. |
|
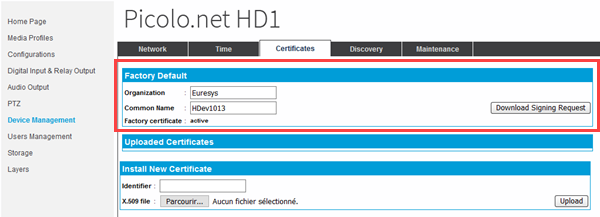
2.
|
In the Device Management section, Certificates tab, fill in the fields in the Factory Default section as follows: |
|
□
|
Organization: type the company name |
|
□
|
Common name: type the device host name of the Picolo.net HD1 specified in the Device Management, Network tab. |
|
3.
|
Click Download signing request and save the generated CSR file locally. |
You will need this file to request the certificate signature from XCA.
Signing the X.509 certificate
|
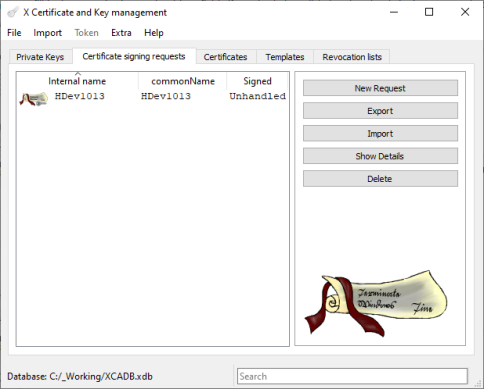
1.
|
In XCA, in the Certificate signing requests tab, click Import and select the CSR file you have just generated. |
|
2.
|
Right-click the imported certificate and select Sign from the contextual menu. |
|
3.
|
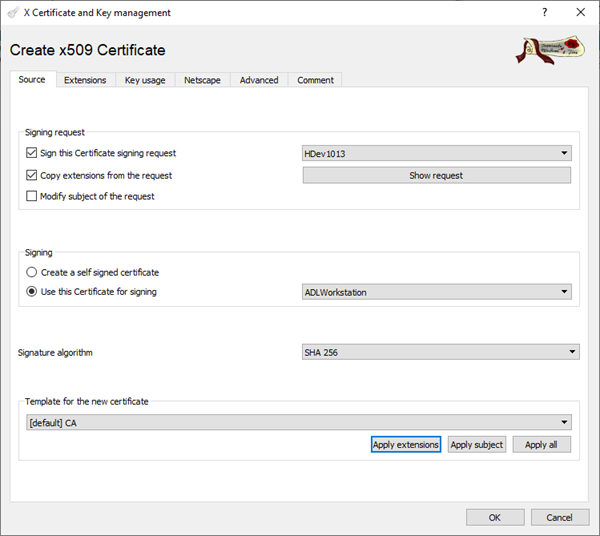
Fill in the fields in the Create x509 Certificate window, Source tab as follows: |
|
□
|
In the Sign this Certificate signing request field , select the certificate signing request you have just imported. |
|
□
|
In the Use this Certificate for signing field, select the root CA certificate (either the certificate issued by the trusted CA or the root CA certificate created in the prerequisite steps). |
|
□
|
In the Template for the new certificate field, select [default] CA. |
|
4.
|
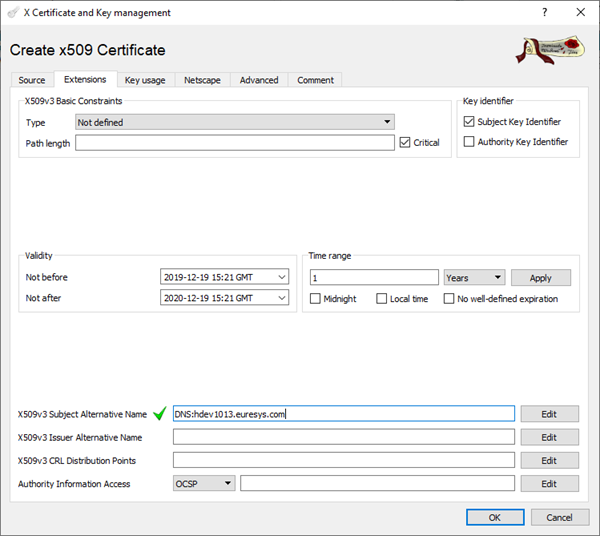
Fill the fields in the Create x509 Certificate window, Extensionstab as follows: |
|
□
|
In the Time range area, specificy a time range for the certificate validity (at least 1 year) and click Apply. |
|
□
|
In the X509v3 Subject Alternative Name field, specify the fully qualified domain name of your Picolo.net HD1 and prefix the string with DNS: |
|
5.
|
In the Create x509 Certificate window, Key usage tab, select the TLS Web Server Authentication key usage and click OK. |
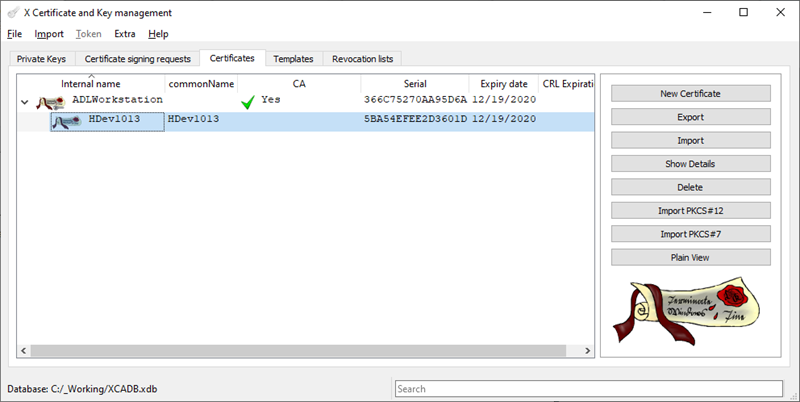
The signed certificate should now appear under the signing (issuer) certificate in the Certificates tab of XCA application:
|
6.
|
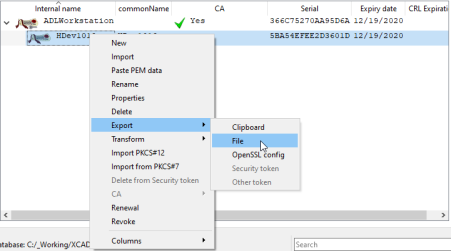
In the Certificates tab, right-click the HD1 certificate and select Export > File from the contextual menu: |
|
7.
|
In the Certificate Export dialog box, change the Export format to PEM Chain (*.pem) and click Export. |
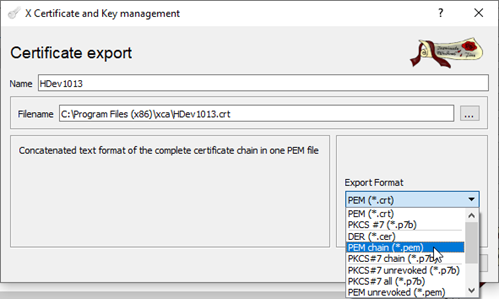
The PEM file is exported to C:\Program Files (x86)\xca.
Upload the X.509 certificate on the Picolo.net HD1
|
●
|
In the Picolo.net HD1 web interface, in the Device Management section, Certificates tab, browse to the PEM file you have just created and click Upload to import it to your Picolo.net HD1. |
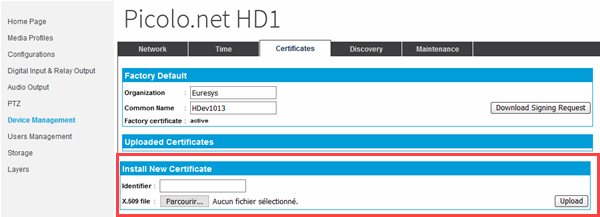
The new certificate is specified in the list of uploaded certificates and has the status active.