Correcting Non-Uniform Illumination
Objective
You'll need first to load an image (step 1), load a light reference image (step 2), and perform the correction (step 3).

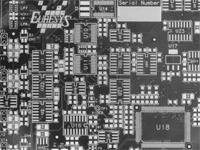
Source image, with non-uniform illumination (left) and corrected image (right)
Step 1: Load the source image
| 1. | From the main menu, click EasyImage, then Uniformize. |
| 2. | Click the Open icon of the Source Image area, and load the image file EasyImage\Board (original).tif. |
| 3. | Keep the default variable name for the new image object, and click OK. |
Step 2: Load the reference image
| 1. | Click the Open icon of the Light Reference area, and load the image file EasyImage\Board (light reference).tif. |
To obtain the light reference image, we used a white screen illuminated in the same condition as the board (original image).
| 2. | Keep the default variable name for the new image object, and click OK. |
Step 3: Perform the correction
| 1. | Click the New icon in the Destination Image area to create a new destination image. |
| 2. | Keep the default values and click OK. |
| 3. | Click Execute to perform the operation. |
| 4. | In both source and destination images, right-click and select 3D Rendering. |
| 5. | In the new 3D windows, click and drag the mouse to rotate the view. Compare the profiles. |