Correcting Skew Effect
Objective
You'll need first to load an image (step 1), create a destination image (step 2), and then set a correction angle to perform the correction (step 3).

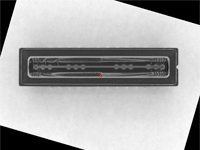
Source image, with a skew effect (left) and corrected image (right)
Step 1: Loading the source image
| 1. | From the main menu, click EasyImage, then Scale and Rotate. |
| 2. | Click the Open icon of the Source Image area, and load the image file EasyImage\CCD.tif. |
| 3. | Keep the default variable name for the new image object In a general content, the term object should be understood with the meaning of a class instance. In EasyObject, an object is a maximally-sized area of adjacent connected pixels belonging to the layer foreground., and click OK. |
Step 2: Creating a destination image
| 1. | Click the New icon of the Destination Image area. |
| 2. | Enter '768' and '576' as image width and height, and click OK to accept the default name. |
Step 3: Setting the correction angle
| 1. | Select the Rotate option, and enter -16.17 in the Angle (Deg) field. (To measure this rotation angle, refer to Measuring the rotation angle of an object.) |
| 2. | From the Interpolation bits drop-down list, select 8 bits to get a better result. |
| 3. | Click Execute to perform the operation. |