Creating a Flexible Mask
Using an ERegion
Objective
Following this tutorial, you will learn how to create a flexible mask from a source image, to restrict a future processing to an arbitrary-shaped do-care area.
Flexible masks can be created in any ways to build a bi-level image. Here, we will first load the source image (step 1), and then successively invert it, and threshold it (steps 2-3). The resulting image —the flexible mask— will be saved as a new image file (step 4). This new image file is a bi-level image. However, there are still black areas that need to be erased, before using the image as a flexible mask. You can use a third-party software, such as Paint, to clear the unwanted areas.
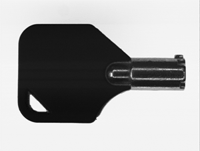

Source image (left) and flexible mask image (right)
Step 1: Load the source image
|
1.
|
From the main menu, click EasyImage, then Arithmetic & logic. |
|
2.
|
Click the Open icon of the Source Image 0 area, and load the image file EasyImage\Key1.tif. |
|
3.
|
Keep the default variable name for the new image , and click OK. |
Step 2: Invert the image
|
1.
|
Click the New icon of the Destination area. |
|
2.
|
Keep the default settings for the new image object, and click OK. |
|
3.
|
In the Operation drop-down list, select Invert, and click Execute |
Step 3: Threshold the image
|
1.
|
From the main menu, click EasyImage, then Threshold. |
|
2.
|
In the Source Image area, select the inverted image from the drop-down list. |
|
3.
|
Click the New icon of the Destination area. |
|
4.
|
Keep the default settings for the new image object, and click OK. |
|
5.
|
Select the Absolute option, enter '46' as the threshold value, and click Execute. |
Step 4: Save the flexible mask
|
1.
|
Right-click in the destination image, and select Save As.... |
|
2.
|
Type a file name for the new flexible mask file. Finally, click Save. |
The new image now is a bi-level image. However, there are still black areas that need to be erased, before using the image as a flexible mask. You can use a third-party software, such as Paint, to clear the unwanted areas.