Enhancing an X-ray image
Objective
Following this tutorial, you will learn how to use EasyImage to enhance an X-ray image.
You'll need first to load an image (step 1), then define convolution parameters to enhance the image (step 2).
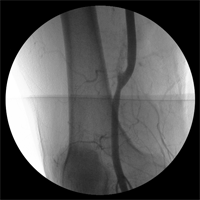
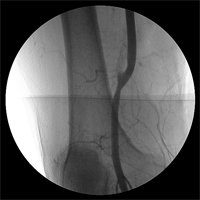
Source image (left) and enhanced image, after predefined and user-defined convolutions (right)
Step 1: Load the source image
|
1.
|
From the main menu, click EasyImage, then Convolution. |
|
2.
|
Click the Open icon of the Source Image area, and load the image file EasyImage\XRay.bmp. |
|
3.
|
Keep the default variable name for the new image , and click OK. |
|
4.
|
Click the New icon of the Destination Image area to create a new destination image. |
|
5.
|
Keep the default variable name and click OK. |
Step 2: Set the convolution parameters
|
1.
|
From the Predefined kernels drop-down list, select Highpass2, and click Execute to perform the operation. |
The image is no longer blurred but the result is bad because the filter has revealed the noise of the source image. We need to create a new convolution kernel that will apply a softer high-pass filtering.
|
2.
|
Click the New icon next to the User defined kernels drop-down list. |
|
3.
|
Keep the default dimension (3x3) and variable name, and click OK. |
|
4.
|
Enter the following kernel data from left to right and top to bottom: -1, -1, -1; -1, 15, -1; -1, -1, -1, and click Apply. |
|
5.
|
Click Execute in the Convolution dialog box to perform the operation. The image is much clearer now. |