Extracting an Object Contour
Objective
You'll need first to load an image (step 1) and set a vector that will contain all the contour points (step 2). Then you'll click an object edge, and the contour will be extracted automatically (step 3).


Contours are extracted from object edges
Step 1: Load the source image
| 1. | From the main menu, click EasyImage, then Contour. |
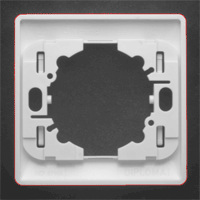
| 2. | Click the Open icon of the Source Image area, and load the image file EasyMatch\Switch1.tif. |
| 3. | Keep the default variable name for the new image object, and click OK. |
Step 2: Set the destination vector
| 1. | Click the New icon in the Destination Vector area. |
| 2. | Keep the default settings and variable name for the new vector object. |
| 3. | Click OK. |
Step 3: Extract the contour
| 1. | When moving the cursor above the image, an arrow appears. |
| 2. | Move the arrow above an object edge, and click. |
From this object edge, a contour is traced, and a red line appears around the object.
The destination vector is filled with the points constituting the contour.