Detecting Highly-Degraded Occurrences of a Reference Model in Multiple Files
Pattern Finding and Retrieving Results
Objective
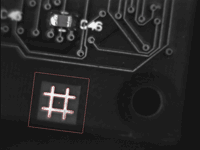
You'll need first to load a reference image, define an ROI where EasyFind will learn the reference model, and set rotation and scaling tolerances for the expected occurrences to search for (steps 1-4). Then you're ready to open multiple files, and perform automatic detection of occurrences (even highly-degraded) of the reference model (steps 5-6).

Reference model


Occurrences of the reference model are found, even if highly-degraded
Step 1: Load the reference image
| 1. | From the main menu, click EasyFind, then New EasyFind Tool. |
| 2. | Keep the default variable name for the new PatternFinder object In a general content, the term object should be understood with the meaning of a class instance. In EasyObject, an object is a maximally-sized area of adjacent connected pixels belonging to the layer foreground., and click OK. The PatternFinder management dialog box is opened. |
| 3. | In the Model tab, click the Open icon, and load the image file EasyFind\Fiducial 1.tif. |
| 4. | Keep the default variable name for the new image object, and click OK. |
Step 2: Create an ROI to define the reference model on the reference image
| 1. | In the image, right-click and select New ROI... item from the menu. |
| 2. | Keep the default variable name for the new ROI object, and click OK. A default ROI is placed over the image (blue rectangle with handles). The ROI management dialog box is opened. |
| 3. | Drag the ROI over the reference model and resize it using its handles. Alternatively, enter the following coordinates in the ROI dialog box: 500, 365, 170, 170 for OrgX, OrgY, Width, and Height respectively, and click Close. |
Step 3: Learn the reference model
| 1. | In the PatternFinder Model tab, select the ROI object from the source image drop-down list, and click Learn. The reference model is perfectly detected (green edges). |
| 2. | In the PatternFinder Search Field tab, select the Image object from the source image drop-down list. Tick the Draw Features check-box. |
The model location and feature Geometrical property of a coded element. points are highlighted in the source image.
Step 4: Set rotation and scaling tolerances
| ● | In the PatternFinder Allowances tab, set both angle tolerance and scale tolerance to 25.0. |
Step 5: Select multiple images
| 1. | In the PatternFinder Search Field tab, click the Open icon. Select the images files EasyFind\Fiducial 2.tif to Fiducial 8.tif (use the shift key to select multiple files), and click Open. |
| 2. | Keep the default variable name for the new Image object, and click OK. The last image appears. The reference model is found, even if highly-degraded. |
| 3. | Detection of the reference model is automatically performed. It is not necessary to click Find once a new image appears, as inspection is automatically performed. However, clicking Find will insert the corresponding code into the script windows. |
| 4. | Click Results to find more information about the found instance. |
Step 6: Browse multiple images
| ● | In the PatternFinder Search Field tab, click the Load Next or Load Previous icons. |
The image files appear, and the reference model is automatically detected.
