Pre-Processing and Saving Images
When should you pre-process your images?
Of course, the best situation is to set up your image acquisition system to have good and easy to process images so the Open eVision tools smoothly and efficiently.
If this is not possible or easy to achieve, you can pre-process your images or your ROIs to enhance and prepare them for the Open eVision tool you want to run.
Using the various available functions, you can adjust the gain and offset of your image, apply a convolution, threshold, scale, rotate and white balance your image, enhance contours... using EasyImage and EasyColor functions.
Pre-processing images
The difference between pre-processing an image and running tools is that the pre-processing generates a new image while the tools mainly extract and retrieve information from the image without changing it.
To pre-process an image or an ROI:
|
1.
|
In the main menu bar, click on the library you want to use (EasyImage or EasyColor). |
|
2.
|
Click on the function you want to use. |
Most function dialog boxes are similar to the one illustrated below with 2 image selection areas and a parameter setting area.

Example of a pre-processing dialog box (Threshold with EasyImage)
|
3.
|
If there are multiple versions for your selected function, open the corresponding tab. |
|
5.
|
In the Destination Image area, open or create a new destination image. |
|
7.
|
Click on the Execute button. |
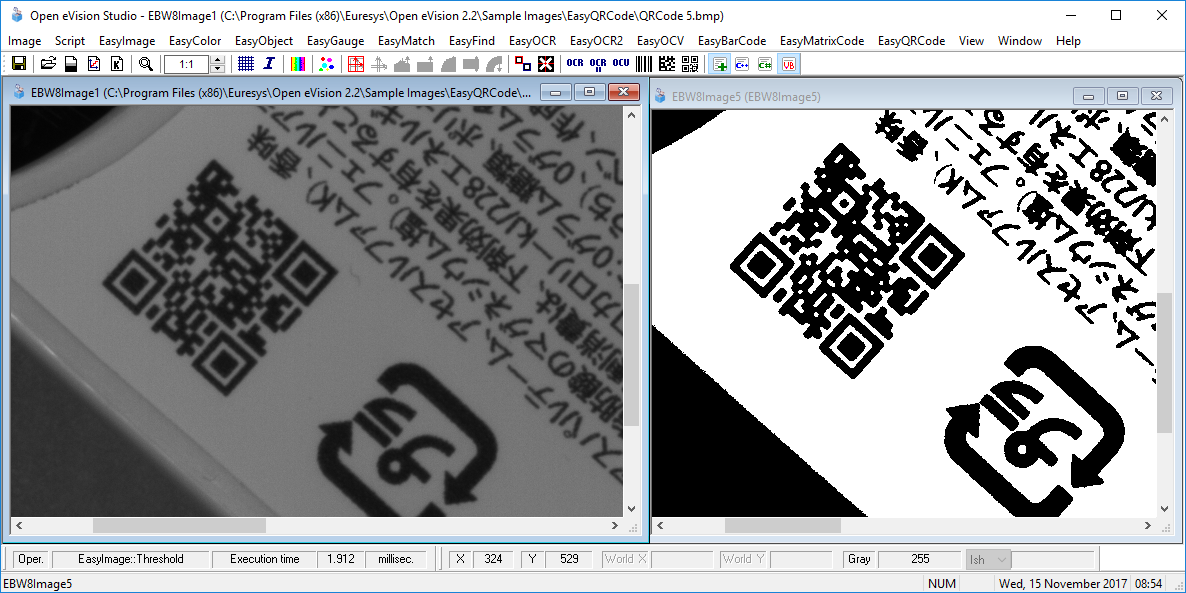
The pre-processed image is available in the destination image as illustrated below.

Source and destinations images (Threshold with EasyImage)
|
8.
|
If you want to use the destination image outside of Open eVision Studio, save it as described below. |
Saving an image
|
1.
|
Click on the image you want to save to makes its window active. |
|
2.
|
To open the save menu either: |
|
□
|
Right-click in the image |
|
□
|
Or open the main menu > Image |
|
4.
|
Select the file format (JPEG, JPEG2000, PNG, TIFF or Bitmap). |
|
5.
|
Enter a name and select a path. |
|
6.
|
Click on the Save button. |


